Tuesday, November 1, 2011

Name our lipstick CONTEST!

Okay ladies and gents, Happy 1st of November.. it's CONTEST time! 


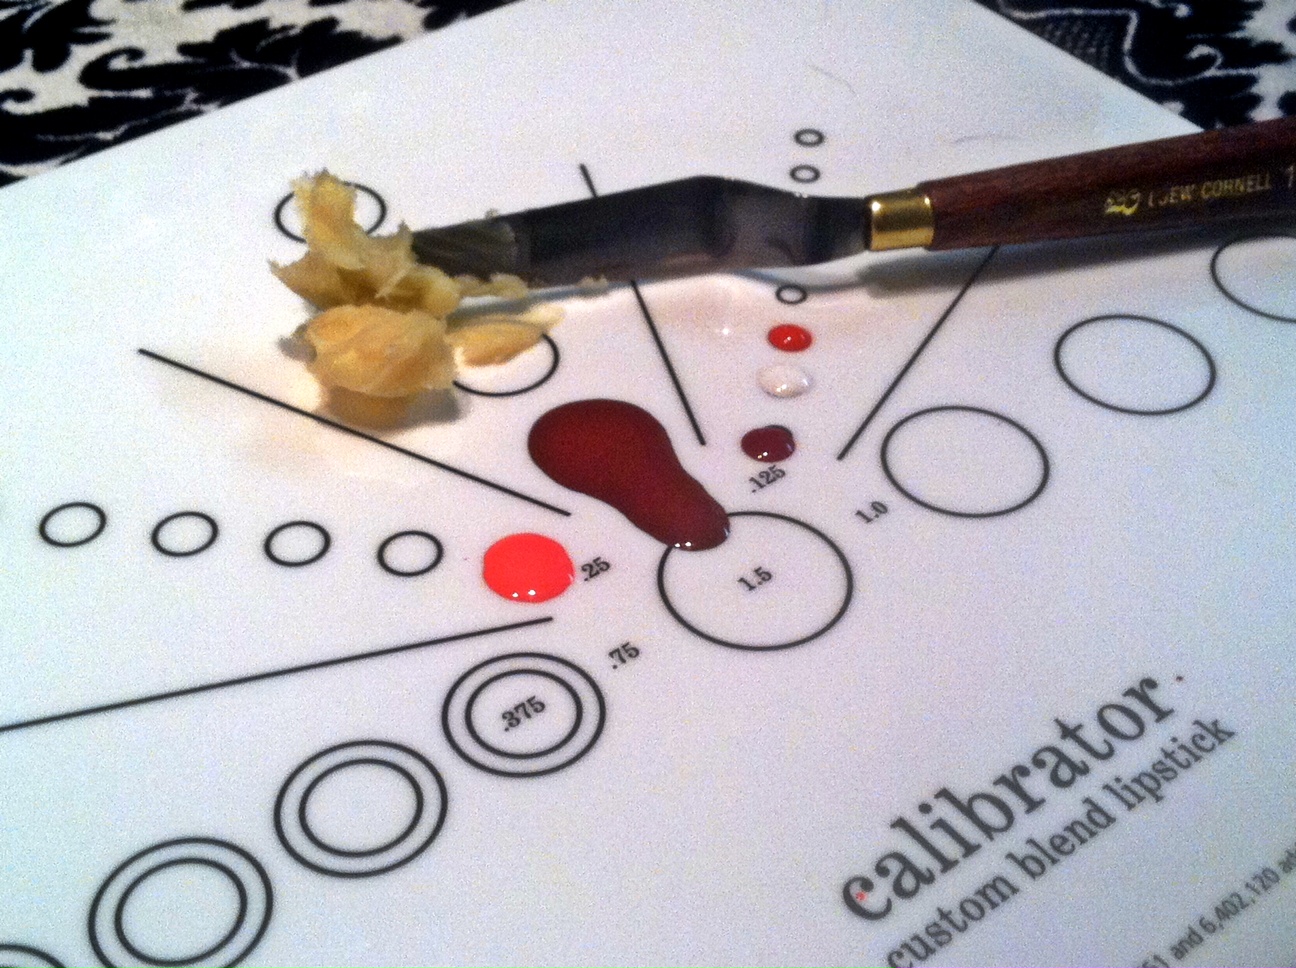
We need to name this lipstick for our Blend Couture ready-made collection!


Best name WINS this lipstick!


.....GO.....

Wednesday, October 26, 2011

Blend Couture- Custom Lipstick, Gloss, Foundation, Concealers!


“Love of beauty is Taste. The creation of beauty is Art.” ~ Ralph Waldo Emerson


Welcome to a whole new world of cosmetics!

After years of working for major cosmetic companies, trying to help women find that “perfect” lipstick and foundation, Blend has come to a bold conclusion: One size does not fit all.

Think about it: we all customize our clothing, jewelry and hairstyles.
Why not customize cosmetics?
Get ready to think outside the make-up counter! 

Blend Make-up Artistry is proud to announce . . . Blend Couture

 At your Blend Couture session, your personal make-up artist works with you, while YOU choose your colors, base, toners, and coverage.  Even add a touch of glam with frost or glitter pigment! Take advantage of our skin-care additives like SPF, Anti-Aging, Botanical Extract, Oil Control, or Ultra-Hydrating Formulas.  All can be added to your products to suit your specific skin-care needs!

Imagine, creating your own go-to lip-gloss, or lip color for your special event. Oh, and the best part… YOU get to name it!

It’s uniquely yours. It’s Couture.

Blend Couture grants you the freedom to express your mood, recreate a favorite discontinued product, and follow the most current beauty trends before they hit the stores. Steering clear of mineral oil, petroleum, animal by-products and parabens, our products are mineral and botanically based for healthy, flawless skin. 

Blend Couture’s services include any or all of the following products:
Custom lipstick, gloss, foundation, and concealer. 

Don’t waste another minute in the department store!
Contact us to begin for your Blend Couture experience.

Here's how it works: Lipstick/Gloss
Choose your color pigment! From sexy red to a muted nude and everything in between, we can help you mix and match to achieve your look!

Next we measure your pigment based on the color you're going for! Want more red? Brown? Neutral? Just let us know!

After you choose your colors, we pick a base color that suits your needs. If you prefer more coverage and a longer lasting finish, matte base would be your best bet! More sheer, almost gloss-like consistency kind of gal? You'll love our butter base!

Add a touch of frost or glitter pigment for high-glam!

Add your choice of delicious smelling scents, and skin-care additives! SPF, Anti-Aging, and Hydrators can all be added to your lipstick to suit your specific needs!

Time to make a mess! Mix, mix, mix!

Now that you love your color, we pour the product into our mold.

Choose your lipstick casing!

Voila! Your brand new lipstick! 

Don't forget to name your gorgeous new lipstick! 


How it works: Foundation/Concealer
First we choose your base color. Select from Oil-Free (for oily skin), and Enriched Formulas (for dry skin) based on your skin-type. 

Next we select your toner. Have excess redness? We balance that with a green toner. Very olive skin? You could benefit from a bit of pink toner. Working on a tan? Yellow-brown could be for you!

Prefer lots of coverage? We can add thickener to give you a matte, full-coverage effect. Alternatively, we can thin out the product for a more sheer result. 

Don't forget the amazing skin-care additives! SPF, Pearlized Pigment, Anti-Aging, Botanical Extract, Oil Control, or Ultra-Hydrating Formulas can all be added to your products to suit your every wish!


We are SO excited to share this new venture with our clients. Now offering discounts for girls nights! Grab a group of girlfriends and let's talk make-up! Can't wait to hear from you.

www.blendevent.com


Thursday, October 20, 2011

Halloween Make-up!

It's our favorite time of year.... HALLOWEEN!!!! (Insert creepy ghost music here)


We are taking appointments from October 28th-31st for creepy, crawly, sexy, bloody Halloween looks! Just shoot us an e-mail with your costume idea, and we will complete your look with AMAZING make-up! 

Wearing a super sexy costume? Also a GREAT time to take advantage of our Mobile Airbrush Tanning services! Remember, get 4 of your girlfriends (or boyfriends) together and get your tan for FREE!

Pricing based on products needed.

Limited availability! Contact us to reserve your spot!

blendeventdc@gmail.com


Tuesday, October 11, 2011

Winter Wedding Special!

It's the most wonderful tiiime of the yearrr!!!

We are offering 15% off of bridal/bridal party make-up services getting married in the months of November-February! 

Yay for discounts! The deal applies only to the first 25 brides who book! So hurry! :)

Contact us to reserve your date: blendeventdc@gmail.com
www.blendevent.com

Thursday, September 15, 2011

Blend Bride, Chantel in the Washingtonian!

Gorgeous Bride Alert: Chantel

We spotted this stunning bride and got the inside scoop on how she got her look—can you believe she just had a baby six weeks before her wedding day?

To keep her skin looking radiant, Chantel drank lots of water in the weeks leading up to her wedding day. All photographs by Susan Hornyak
New mom Chantel wanted to look “classic and elegant” for her recent wedding to Stephen at Oxon Hill Manor, photographed by Susan Hornyak.

“I wanted to look like a million bucks without spending a million bucks,” she said.

Here’s how she got the look:

Gown: David’s Bridal in Bowie
“I was very hesitant to try on a lace gown because I felt like lace was too old-fashioned,” says Chantel. “But once I tried it on, I instantly fell in love! I knew it would look perfect at in the gardens at the manor. To top it all off, the gown was in my price range! I saved enough money to buy a veil, bra, and mermaid slip.”
Shoes: Max Studio from DSW.com
“I wore a satin sandal with five-inch heels,” Chantel says. “I’ve never worn five-inch heels in my life but they were so comfortable. Definitely a shoe I will wear again.”
Jewelry: “I had the honor of wearing my mother’s pearl earrings, necklace, and bracelet,” says Chantel. “She purchased them years ago in China.”
Hair Stylist: Alonda Butler of Anointed Hands Hair Salon in Upper Marlboro (301-856-0007)
“I selected an elegant bun that could easily be taken down into a long ponytail for my reception,” Chantel says.
Makeup Artist: Marquia Kinard of Blend Make-Up Artistry
“I wanted the focus to be on my eyes,” says Chantel.
Reception Dress: Betsy & Adam from Nordstrom
“I was told wearing a reception dress was a good way to wow the guests a second time—and that was so true!” says Chantel. “I also switched into adorable lace ballet slippers from DSW.”
Nails: Fancy Nails in Mitchelville
Something Old: Mother’s pearl necklace
Something New: Wedding gown
Something Borrowed: Mother-in-law’s wedding band
Something Blue: Garter
chantel-gorgeous-bride-1
chantel-gorgeous-bride-2

Wednesday, September 14, 2011

The Perfect Brow


By:  Blend Makeup Artistry
Ryan Krasney, Kathy Schultz, and Marquia Kinard


Let’s face it, cleanly shaped brows can drastically change a person’s entire look. Well defined brows make a huge difference in shaping the face and completing a beautiful makeup application.  They also make for a flawless photograph by really defining those eyes you worked so hard on!  So, get ready to practice, ladies. The Blend team has compiled the hottest secrets of celebrity-brow gurus, along with what we’ve discovered in our own experiences with clients (the good, the bad, and the caterpillar brows).  The result ~ fool proof, lovely eyebrows!  


1.     Groom the brow. Using an upward and outward stroke, brush brows moving in   the direction of the hair growth. 


Tip:  A wise woman once told me, “Eyebrows are sisters, not twins.” Don’t expect one brow to be an exact mirror image of the other, it just ain’t gunna happen, sister. Let it go!

2.     Select color of shadow and/or eyebrow pencil. If you’re unsure, a good rule of thumb is to choose a tone one shade lighter than your current hair color.

Tip: Do not use black liner or pencil in your brow!  It will look harsh no matter what your natural skin tone or hair color.  Avoid it!


3.     Gently lift the brow at its arch.  Using eyebrow pencil softly outline bottom of brow. 

4.      Now, using brow shadow, take an angled brush and dip into shadow. 

Tip: To avoid putting too much product in one place, be sure to tap any excess shadow off of your brush. This keeps the application naturally gorgeous. Less is more!

5.    Once again, lifting brow at arch, brush product in an upward motion starting at the inner corner of brow. Continue to fill in brow using small strokes following the natural direction of the hair.  Use as much shadow as needed, remembering to tap off excess. (Don’t worry about any stray hairs right now, we’ll show you how to fix that later) 

Tip: Hold brush so that the pointed side of the angle is pointed towards inner corner of brow. 


6.     Now that the brow is filled in and looking fabulous, choose a concealer that is a shade lighter than your skin tone.  Using a small concealer brush, saturate both sides of concealer brush with product. (Trust us... this is the fun part!)

7.     Starting at the inner corner of the brow just below the hairline, draw a line of concealer following the natural shape of the brow. 

Tip: This is an amazing trick if you haven’t had time to tweeze or wax. The concealer will actually hide any small hairs that have grown back!

8.     Wipe down concealer brush and then blend concealer down into brow bone.  Blend in any excess product.  This is the Hollywood secret for really defining and getting that beautiful brow shape.

9.     Remember we promised to show how to fix those pesky strays? This is the step! Ready? So easy... simply use an eyebrow gel or clear mascara! Gently brush the product through brow hair in an upward and slightly outward direction. 

Now, step back and make sure both brows are balanced. Despite lining, concealing and filling them in, you should be seeing a soft definition.
VoilĂ ....perfect brows!


Friday, September 2, 2011

How-to: Create Perfect Smokey Eye!


Ahhh the smokey eye. Is there anything more glamorous? This sexy look will transform even the most modest woman into smoldering diva! From huge name celebrities like Kim Kardashian and Cameron Diaz, to soccer moms and prom queens, everyone wants to know how to achieve a smokey eye.
There are many different variations of “smokey” so we’ve created a more classic bridal version of this sultry stunner. Follow the steps for your own personal transformation!
For this look we are going to start with the eyes. Do not apply your foundation or concealer yet. We know it sounds a little backwards, but inevitably, there will be fall out from the dark shadows, and dark pigment smudged into under-eye circles is not the look we’re going for!
Step 1: Start by priming the lid from the base of the lash line, into the crease and up onto the brow bone. Blend until the surface is smooth and all one color.
Product Tip: Our favorite primers are Urban Decay, Eyeshadow Potion and MAC, Paint Pots.
Step 2: Using a small eyeshadow brush and soft vanilla shadow, blend product onto lower part of eyelid stopping just below the crease.
Tip: Apply shadow in a patting potion to get more opaque coverage.
Step 3: Then, using a blending brush, start from outer corner of crease in a rainbow shape back and forth motion throughout the crease. Be sure to use a taupe or neutral color, just a couple of shades darker than your skin tone. This contours the eye crease and gives it shape and definition.
Step 4: Using the same blending brush take a smokey grey color and apply it to the outer corner of the eyelid in a “V” shape.
Tip: For more depth or pop try this! Using a separate blending brush (or clean the previous brush), dip into a deep brown or deep plum shadow and blend from outer corner in the same area as the grey.
Step 5: Now, go back to your neutral color used in #3 and soften the crease. There should be no obvious color change. Think: smooth transitions.
Step 6: With a clean brush apply a shimmery cream color to the brow bone. Blend!
Step 7: Use a kohl black (kohl liners are softer and easier to smudge!) or grey eyeliner pencil to line the top lash line. Be sure to get far into the inner corner lash line!
Product Tip: We like Urban Decay liner in Zero.
Step 8: For a super fabulous smokey look use a smudge brush (or Q-tip) to soften the eyeliner line.
Tip: It’s okay if the liner smudges out below the waterline and looks a bit messy. This adds to the smokey effect.
Step 9: Use same liner on bottom water line and work all the way from corner to corner. Once again take smudge brush (or Q tip) and repeat smudging step on bottom water line.
Tip: Whenever using a creamy liner, be sure to use a translucent or matching powder right on top of it to set the look and keep it lasting all night!
Step 10: Finish with 2 coats of black mascara on both upper and lower lashes to finish your amazing smokey eye!
Feeling sexy already? Now wipe away any fall out with make-up remover or a wipe and continue with concealer and foundation. Don’t forget to keep the lip and blush neutral. We want to let the eyes be the focus!
Enjoy!